End-to-End Deployment Workflow Explained
Modern software development requires a clean, predictable, and secure workflow from the moment code is written on a developer’s machine until it reaches production. Whether you work with Drupal, Node.js, Java, Laravel, or any modern framework, the deployment lifecycle remains structurally similar.
This guide explains each environment, how to maintain a robust branching strategy, how to version releases with tags, and how to implement safe rollback mechanisms. By the end, you’ll have a complete blueprint of how code should flow from Local → Development → QA → UAT → Production.
1. Understanding the Different Environments
Let’s break down the purpose and responsibilities of each environment.
1.1 Local Development Environment
Used by: Developers
Purpose:
Writing code
Running local servers
Testing logic before committing
Running unit tests
Tools used: Docker, Lando, DDEV, XAMPP, WAMP, Local PHP servers, npm, composer, etc.
Good practices:
Local should mimic production as close as possible (Docker-based setups are ideal).
Developers must regularly pull the latest code from the repository to avoid conflicts.
1.2 Development (DEV) Environment
Used by: Developers & Tech Leads
Purpose:
Integrate code from multiple developers
Fix merge issues
Test modules/features
Validate backend integration
Early functional testing
Good practices:
Auto-deploy from feature branches or
developbranchTurn ON detailed logging
Allow debugging tools
1.3 QA Environment
Used by: QA team
Purpose:
Full system testing
Regression testing
Bug verification and bug logging
Automated test runs (if available)
Good practices:
Deploy code only from a stable branch (typically
release/x.x.x)Database should be refreshed periodically from production (after sanitization)
1.4 UAT (User Acceptance Testing) Environment
Used by: Business teams, Product owners, Clients
Purpose:
Accept or reject the release candidate
Validate that features match requirements
Final approval before production
Good practices:
UAT should ONLY accept code already tested in QA
1.5 Production Environment
Used by: End users / Public
Purpose:
Live platform where real users interact
Must be stable, secure, monitored
Good practices:
Deployment ONLY from approved release tags
Zero downtime deployments
Monitoring & alerting (NewRelic, Prometheus, ELK, CloudWatch)
Automated backups
No direct developer access
No experimental code
2. Recommended Git Branching Strategy
A clear branching model ensures that teams avoid conflicts, parallel development stays clean, and releases become predictable. The most widely used models are Gitflow, Trunk-based development, and custom hybrid models.
Below is a simplified and effective Gitflow-based strategy.
2.1 Main branches
1. main or master
Always contains production-ready code
Only accepts code via pull requests from
release/*branchesEach commit/version in this branch should be tagged
2. develop
The integration branch for developers
Contains code ready for QA
Accepts merges from multiple feature branches
2.2 Supporting branches
1. Feature branches
Naming: feature/feature-name
Used for:
New features
Enhancements
Major refactoring
Merged into → develop
2. Hotfix branches
Naming: hotfix/issue-123
Purpose:
Fix critical production issues quickly
Merged into → main and develop
2. Hotfix branches
Naming: hotfix/issue-123
Purpose:
Fix critical production issues quickly
Merged into → main and develop
3. Release branches
Naming: release/1.2.0
Purpose:
Prepare code for QA/UAT
Stabilize before production
Freeze new features
Merged into → main (with tag) and develop.
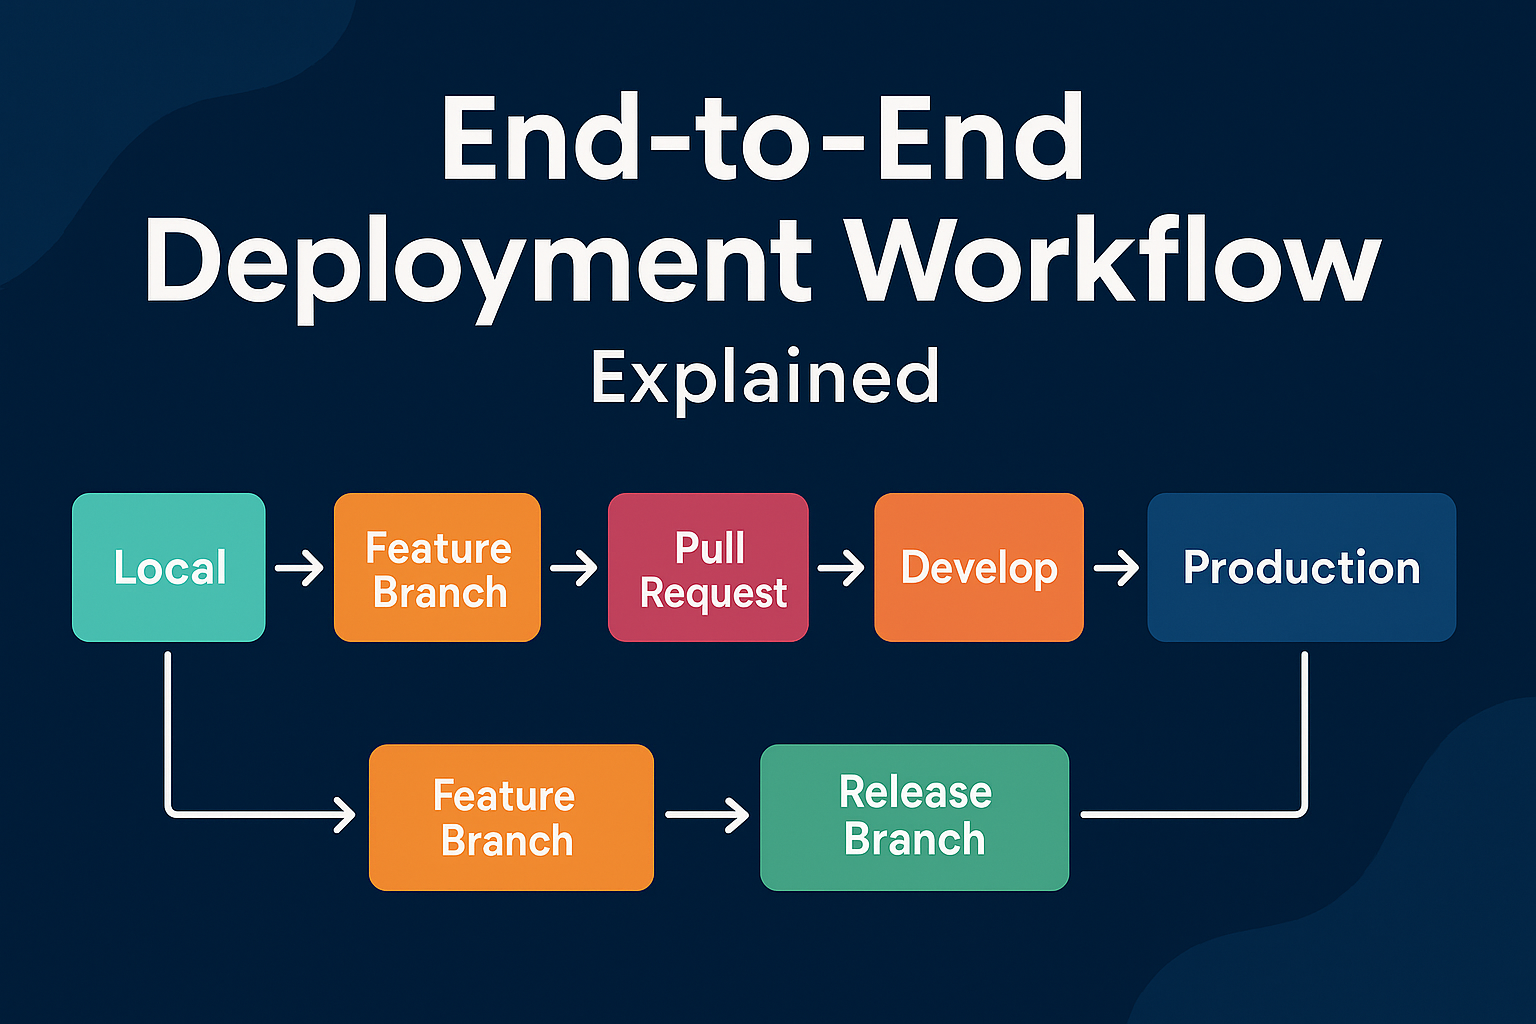
3. Code Flow: Local → Dev → QA → UAT → Prod
Below is the recommended step-by-step flow.
Step 1: Developer works locally
Create branch from
develop:
git checkout develop
git pull
git checkout -b feature/user-login
Write code
Commit changes
Push branch
Create Pull Request (PR) into
develop
Step 2: DEV environment deployment
Once PR is merged,
developbranch is auto-deployed to DEV environmentIntegration and smoke testing happens
If issues → fix in feature branch → merge again
Step 3: Create a release branch for QA
When DEV is stable:
git checkout develop
git checkout -b release/1.0.0
git push
QA team tests release
Bugs → fixed in
release/1.0.0and mergedNo new features allowed
Step 4: Deploy to UAT
When QA approves:
Same release branch is deployed to UAT
Business/Client validates features
If approved → mark as “Go Live”
Step 5: Merge into main & tagging
After approval:
git checkout main
git merge release/1.0.0
git tag -a v1.0.0 -m "Production Release 1.0.0"
git push origin main --tags
Tagging ensures we can always roll back to this exact version
Step 6: Deploy to production
The tagged version (v1.0.0) is deployed using:
Jenkins
GitHub Actions
GitLab CI
Bitbucket Pipelines
Acquia / Pantheon pipelines
Custom deployment script
Production must ALWAYS be deployed using tags, not branches.
4. Versioning & Tags
Semantic versioning is recommended:
MAJOR.MINOR.PATCHExamples:
1.0.0 – first production release
1.1.0 – new features
1.1.1 – minor bugfixes
2.0.0 – breaking changes
Every production release must have a tag so rollback becomes easy.
5. Rollback Mechanisms
Something goes wrong after a release? Rollback is your safety net.
5.1 Rollback using Git tags (fastest & safest)
5.3 Infrastructure rollback
If using containers:
Keep previous Docker images
Rolling back is as simple as
docker pull myapp:v0.9.0
docker run myapp:v0.9.0